Autopapyrus · SsangYong Kyron 2.0 XDi (2010)
https://autopapyrus.com/guides/ssangyong/kyron/front-shock-absorber-replacement/
https://autopapyrus.com/guides/ssangyong/kyron/front-shock-absorber-replacement/
Compiled automatically from service literature and owner experience. Specs are for the typical configuration — check them against your exact car before you start.
SsangYong Kyron 2.0 XDi (2010): Front Shock Absorber Replacement
The front shock absorbers on the Kyron can be replaced either as a complete strut assembly or separately (which requires a spring compressor). This guide covers replacing the complete strut assembly (easier and safer). The service life of the original shock absorbers is 60,000-100,000 km (37,000-62,000 mi). Work on one side at a time.
Parts
4| № | Part | Genuine part no. | Alternatives |
|---|---|---|---|
| 01 | Front shock absorbersleft and right | 443010910C | Sachs, Monroe |
| 443020910B | |||
| 4430109058 | |||
| 4430209058 | |||
| 02 | Strut top mount bearingsat over 80,000 km (50,000 mi) | CTR CVKD-23 | |
| 03 | Shock rod dust boots | 4432308000 | Febest NSHB-001 |
| 04 | Self-locking M14 nuts, upper mount2 pcs |
Part numbers are from the manufacturer's original catalogue. Check them against your VIN before ordering.
Tools
9- jack
- jack stands
- socket set 12/14/17/19/22 mm
- box-end wrenches 17/19/22 mm
- 22 mm socket
- pry bar
- torque wrench
- WD-40
- wire brush
 There's a full repair manual for this car
Every system, wiring diagrams and torque specs — not just this job. Haynes AutoFix (online).
See manuals →
Step by step
32 steps · 5 phasesPhase 1 PREPARATION AND INSPECTION 4 steps
- Park the vehicle on level ground, apply the parking brake, and select 1st gear (or P for an automatic transmission).
- Loosen the front left wheel bolts half a turn (do not remove them completely).
- Raise the front left side with a jack at the frame rail (the jacking point is the reinforced area in front of the rocker panel) and place a jack stand under the frame.
- Remove the wheel and inspect the shock absorber for oil leaks and the condition of the rod dust boot.
Phase 2 FRONT STRUT REMOVAL 10 steps
- Open the hood and locate the upper strut mount: three 14 mm nuts under a plastic cover in the engine bay (above the wheel arch).
- Remove the plastic protective cover (pry it off with a screwdriver, or remove one screw, depending on trim level).
- Treat the three upper nuts and the shock rod with WD-40 and wait 5 minutes.
- Hold the shock rod with a 6-8 mm wrench (hex socket in the center of the rod) and loosen the central 22 mm nut, but not all the way: leave 2-3 turns of thread engaged.
- Remove the three outer 14 mm nuts that secure the top mount bearing to the body strut tower.
- Under the vehicle, locate the lower strut mount to the steering knuckle: two 19 mm bolts with nuts.
- Treat the lower bolts with WD-40, then remove the nuts with a 19 mm wrench while holding the bolt from the other side.
- Tap the bolts out of the knuckle with light hammer blows (they may be seized, so apply penetrating oil again).
- While supporting the strut by hand, fully remove the central upper 22 mm nut.
- Lower the complete strut assembly out through the wheel arch (you may need to move the brake hose aside; do not disconnect it).
Phase 3 INSTALLING THE NEW STRUT 11 steps
- Inspect the upper and lower mounting surfaces and clean off rust and dirt with a wire brush.
- Check the new strut: the rod should move smoothly without sticking, the dust boot should be intact, and the top mount bearing should turn freely.
- Install the new strut from below through the wheel arch and insert the rod into the upper hole in the strut tower.
- Thread the central 22 mm nut onto the rod by hand (2-3 turns) to hold the strut in place.
- Align the holes in the top mount bearing with the three studs/holes in the strut tower.
- Thread on the three outer 14 mm nuts and tighten them in a crisscross pattern to 20-25 N·m (15-18 lb-ft) (verify in the service manual; the range is 18-30 N·m (13-22 lb-ft)).
- While holding the rod with the hex wrench, tighten the central nut to 60-80 N·m (44-59 lb-ft) (the exact value per the SsangYong manual is 70-90 N·m (52-66 lb-ft); use a torque wrench).
- Under the vehicle, align the strut's lower mounting tabs with the holes in the steering knuckle.
- Insert the two lower mounting bolts and thread on the 19 mm nuts by hand.
- Tighten the lower nuts to 90-110 N·m (66-81 lb-ft) (verify the exact value in the service manual; this torque is critical for suspension geometry).
- Install the wheel and thread on the bolts by hand.
Phase 4 REPEAT ON THE RIGHT SIDE 2 steps
- Lower the left side off the jack stand and tighten the wheel bolts in a crisscross pattern to 100-120 N·m (74-89 lb-ft).
- Repeat steps 2-25 for the right front strut.
Phase 5 CHECKING AND FINISHING UP 5 steps
- Lower the vehicle onto all four wheels and perform the final tightening of all wheel bolts to 100-120 N·m (74-89 lb-ft).
- Install the plastic protective covers on the upper strut mounts in the engine bay.
- Bounce the suspension by pushing down on each corner of the body 5-7 times; the struts should damp the oscillation within 1-2 cycles without any knocking.
- Drive 10-15 km (6-9 mi) and listen to the suspension; there should be no metallic knocks or squeaks.
- After 50-100 km (30-60 mi) of driving, be sure to have a wheel alignment done on an alignment rack, because replacing the struts throws off the wheel alignment angles.
Common mistakes and warnings
- Always replace shock absorbers in pairs (both front ones at the same time); different stiffness between the left and right sides causes the vehicle to pull during braking
- Use a torque wrench for both the upper and lower mounts: under-tightening causes knocking, and over-tightening strips the threads or deforms the top mount bearing
- If you decide to replace only the shock absorber without the complete strut (which requires disassembling the spring), you must use spring compressors; working without them is extremely dangerous and can be fatal
- A wheel alignment is mandatory after replacing the struts, otherwise the tires will wear out within 5,000-10,000 km (3,000-6,000 mi)
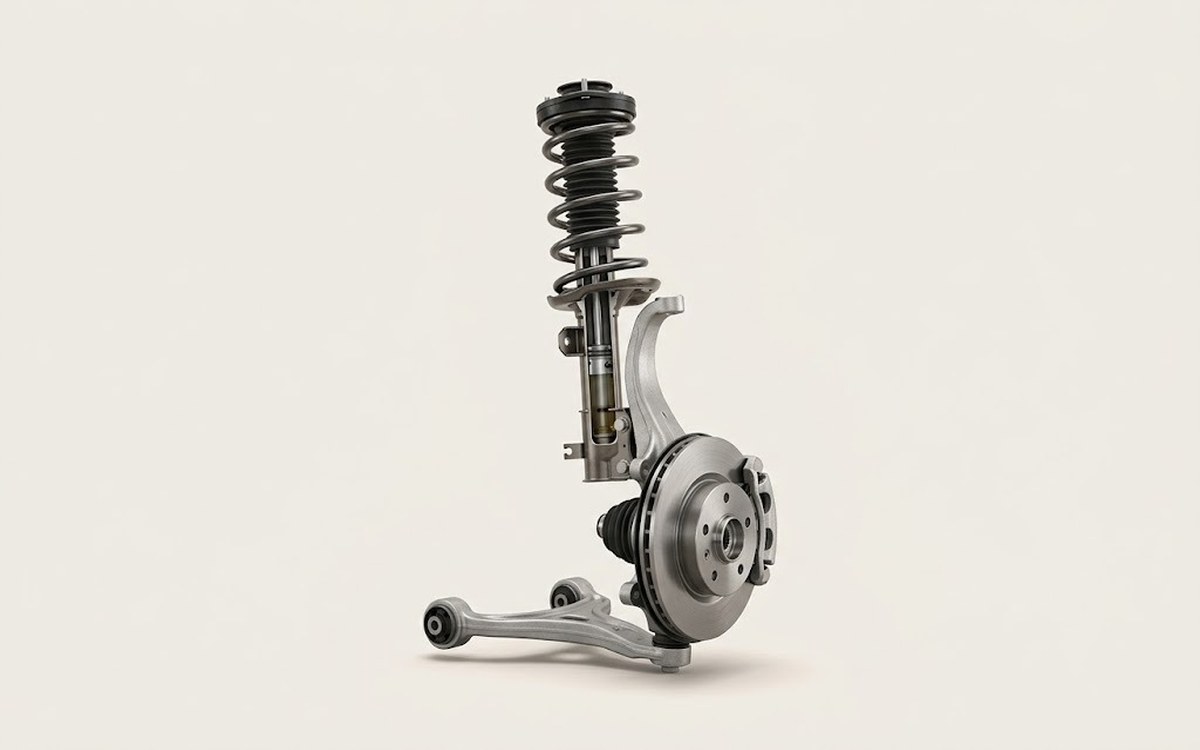 How it works · 3D
How Car Suspension Works
How the part you're working on actually works — in plain English, on a 3D model.
Open in 3D →